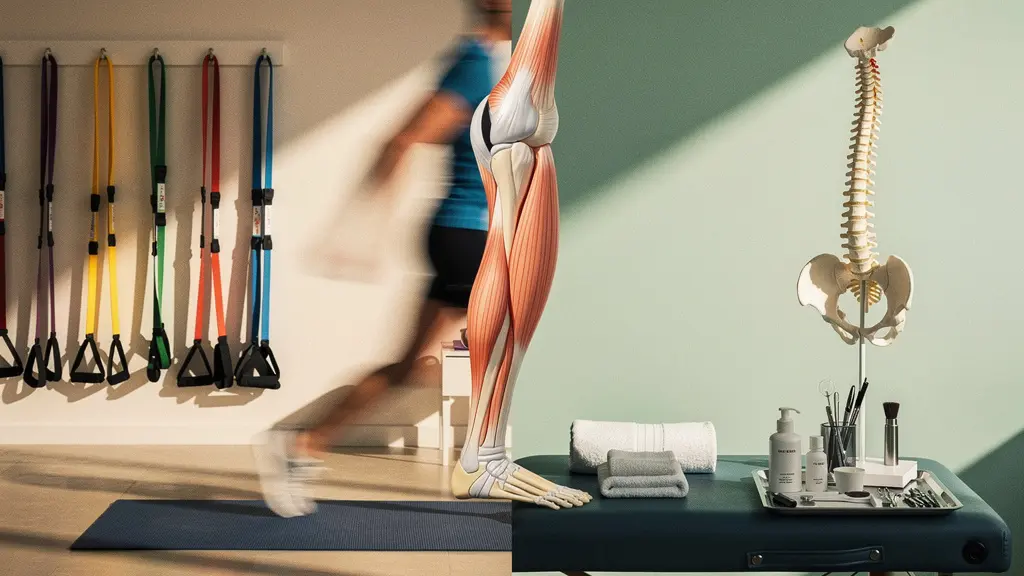
The critical choice for a torn hamstring isn’t “Physio vs. Chiro,” but understanding the correct *sequence* of care that transitions you from injury back to performance.
- Effective rehabilitation must progress from passive manual therapy for initial pain relief to active, progressive loading to build resilience.
- Identifying the true root cause of the injury—such as weak glutes or poor mechanics revealed by an Overhead Squat Test—is more critical for long-term success than only treating the hamstring itself.
Recommendation: Base your return to sport on passing objective exit criteria (like strength and functional tests), not just on the absence of pain, to drastically reduce your risk of reinjury.
You felt it. That sudden, sharp “pop” in the back of your thigh during a sprint, followed by a searing pain. The diagnosis is a torn hamstring. The immediate, confusing question follows: Who do you call? A physiotherapist or a chiropractor? The internet offers a simple but frustratingly vague answer: physios give you exercises, and chiros perform adjustments. This common dichotomy is the source of endless debate and paralysis for an injured athlete eager to get back in the game.
This framework, however, is fundamentally flawed. It pits two professions against each other when, in reality, a successful recovery doesn’t depend on choosing a side. It depends on understanding the entire rehabilitation process as a strategic journey—a rehab continuum. The critical question isn’t *who* you should see, but *what* you need at each specific stage of your recovery, *when* you need it, and how to measure progress objectively.
This guide will not give you a simple “choose A or B” answer. Instead, it will provide a clear, directive roadmap from the triage perspective of a sports medicine professional. You will learn to identify the right kind of practitioner, understand the shift from passive to active care, take ownership of your recovery, and know the exact criteria that signal you’re ready to transition from a patient back to a high-performing athlete.
To navigate this complex journey effectively, this article is structured to guide you step-by-step. Below, the summary outlines the key phases of a successful hamstring rehabilitation, moving beyond the simplistic practitioner debate and focusing on what truly matters: your long-term recovery and performance.
Summary: Physio vs. Chiro: A Strategic Guide to Hamstring Recovery
- Why a physio gives you exercises while a chiro gives you adjustments?
- How to identify a “sports-specific” physio vs a generalist?
- Manual Therapy vs. Active Rehab: Which yields long-term results?
- The patient error that makes physio useless (doing exercises only in the clinic)
- When to stop seeing the physio and start seeing a strength coach?
- How to perform the “Overhead Squat Test” to find mobility leaks?
- Why frame-by-frame analysis reveals the true cause of tennis elbow?
- How to Accelerate Soft Tissue Repair Without Anti-Inflammatories?
Why a physio gives you exercises while a chiro gives you adjustments?
At its most basic, the distinction between physiotherapy and chiropractic care is rooted in philosophy. A traditional chiropractor focuses on structural integrity, primarily of the spine, believing that proper alignment allows the nervous system to function optimally and facilitate healing. Their primary tool is the “adjustment,” a high-velocity, low-amplitude thrust to a joint. For a hamstring injury, a chiro might adjust the pelvis or lower back to ensure nerve signals to the leg are unimpeded.
A physiotherapist (PT), on the other hand, is primarily concerned with functional movement. Their philosophy centers on restoring mobility, strength, and proper motor patterns through targeted exercises and manual therapy. For a torn hamstring, a physio’s first goal is to manage pain and swelling, then progressively load the tissue with specific exercises to encourage strong, organized scar tissue formation and rebuild capacity.
However, this black-and-white distinction is becoming increasingly outdated. Modern, evidence-based practitioners from both fields often operate in the grey area. A good sports chiropractor will incorporate soft tissue work and corrective exercises, while a skilled sports physio will use manual therapies, including joint mobilizations that resemble adjustments, to improve mobility before prescribing exercises. The label on the door is less important than the practitioner’s approach. The crucial task for you, the athlete, is to diagnose their philosophy and ensure it aligns with a modern, active approach to rehabilitation.
How to identify a “sports-specific” physio vs a generalist?
Not all practitioners are created equal, especially when it comes to athletic injuries. A generalist physio or chiro, who primarily treats chronic lower back pain in sedentary adults, will have a vastly different approach than a sports specialist who treats competitive athletes daily. A generalist may clear you to “return to activity” when you can walk without pain. A sports specialist will not clear you until you can sprint, cut, and jump with confidence and symmetrical power. Their goal isn’t just to make you pain-free; it’s to make you resilient to the demands of your sport.
The quality of the initial assessment is a major differentiator. A specialist conducts a comprehensive, full-body assessment to find the root cause, not just treat the symptom. The impact of this is significant; for example, research on hamstring recovery timelines shows that athletes with a minimal knee extension deficit of less than 10 degrees recovered in about 7 days, whereas those with a deficit of 30 degrees or more required nearly 55 days. A sports specialist knows these metrics and tests for them. They speak in terms of objective data: degrees of motion, limb symmetry indexes, and force production, not just subjective feelings of “better.”
Your Action Plan: Practitioner Audit Checklist
- Initial Contact: When booking, explicitly ask what percentage of their practice involves treating competitive athletes and what their experience is with hamstring injuries specifically.
- Collect Evidence: During your first visit, take note of the questions they ask and the tests they perform. Do they look beyond the hamstring? Do they assess your hips, core, and running mechanics?
- Check for Coherence: Ask them about their treatment philosophy. Does their plan focus on empowering you with a home exercise program (active rehab) or does it rely heavily on in-clinic, hands-on treatments (passive care)?
- Assess their End Goal: Question their return-to-sport protocol. Look for mentions of specific, objective metrics like strength deficits of less than 10%, hop tests, and sport-specific movement screens. Vague, time-based progressions are a red flag.
- Formulate Your Plan: Based on their answers, decide if this practitioner’s approach is geared towards high-level performance and injury prevention, or simply general pain relief.
Finding a practitioner who understands the unique demands of athletics is the first and most critical step in ensuring your recovery is not only complete but also reduces the risk of recurrence.
Manual Therapy vs. Active Rehab: Which yields long-term results?
The debate between manual therapy (passive treatment) and active rehab (exercise) is not about which one is better, but which one is appropriate for the current phase of your recovery. A successful rehabilitation is a dynamic continuum that strategically shifts the balance from passive to active over time. Relying too heavily on one or the other is a common path to reinjury. In fact, research indicates that nearly one-third of hamstring strains recur within the first year following return to sport, often because the rehab process was incomplete.

In the initial acute phase (the first few days to a week), the focus is on pain and swelling management. Here, manual therapy is king. Techniques like soft tissue massage, gentle mobilization, and compression help calm the area and prepare it for movement. Active rehab is minimal, consisting of only gentle, pain-free activation. As you move into the sub-acute and strengthening phases, the roles dramatically reverse. Manual therapy becomes a supporting tool used to address specific restrictions, while active rehab—progressive loading through targeted exercises—becomes the star of the show. This is where the real healing and strengthening occurs.
The goal of a good therapist is to make you independent. If your treatment plan consists primarily of you lying on a table receiving adjustments or massages week after week with no clear progression in your exercise program, you are not on a path to long-term success. You are on a path to dependency. The table below illustrates how the focus should shift as you heal.
| Recovery Phase | Manual Therapy % | Active Rehab % | Duration |
|---|---|---|---|
| Phase 1: Acute (Week 1-2) | 80% | 20% | Gentle movement only |
| Phase 2: Sub-acute (Week 2-4) | 50% | 50% | Foundation building |
| Phase 3: Strengthening (Week 4+) | 20% | 80% | Sport-specific prep |
This strategic shift is the cornerstone of modern sports rehabilitation. It ensures that you’re not just feeling better, but truly getting stronger and more resilient than you were before the injury.
The patient error that makes physio useless (doing exercises only in the clinic)
Here is a hard truth from the front lines of sports medicine: the single biggest factor that determines the success or failure of your rehabilitation is not the practitioner you choose, but your own actions between appointments. A physiotherapist can have the perfect plan, but it is rendered completely useless if you treat your session as the treatment itself, rather than a coaching session for the work you must do on your own.
The most common patient error is viewing rehab as something that happens *to* you for an hour, twice a week. In reality, the 20-30 minutes of daily, prescribed homework is where the magic happens. The physiological adaptations required to heal and strengthen tissue do not occur from sporadic effort. They require consistent, frequent stimulus. As exercise dosage research shows, even for general injury risk reduction, a minimum frequency of specific exercises like Nordics is required 1-2 times per week. For actual strength and tissue remodeling post-injury, the volume and frequency need to be even greater and more consistent.
The “Hamstring Awareness” Cycle
A common scenario seen in clinics is the athlete with a Grade 1 or 2 strain who feels better after a week or two of rest and a few sessions. They stop doing their exercises because the pain is gone. They return to their sport, and for a while, things seem fine. Then, during an explosive movement, they feel a familiar twinge. It’s not a full tear, but a low-grade irritation—a phenomenon known as “hamstring awareness.” This cycle of feeling good, stopping rehab, and experiencing a minor setback repeats, creating chronic weakness and a high risk of a major reinjury because the tissue never completed the final, crucial phases of strengthening and remodeling.
Your physio appointment is a strategy session. It’s where your program is assessed and progressed. The actual work—the sets and reps that rebuild your body—is your responsibility. Thinking you can get better by only doing the exercises in the clinic is like thinking you can learn a language by only speaking it for one hour a week with a tutor. It simply doesn’t work.
When to stop seeing the physio and start seeing a strength coach?
A common mistake athletes make is staying in formal rehabilitation for too long. A physiotherapist’s primary job is to take you from injured to functional. A strength and conditioning coach’s job is to take you from functional to high-performing. Knowing when to make this handoff is crucial for a successful and safe return to sport. Continuing with low-level rehab exercises when you are ready for high-level performance training can lead to stagnation and a false sense of security.
The transition should not be based on time or the absence of pain. It must be based on achieving specific, objective “exit criteria.” These are measurable benchmarks that prove your injured leg has regained the strength, power, and control necessary to handle the demands of your sport. A good sports physio will have these criteria built into their plan from day one and will be actively working to help you “graduate” from their care. Conversely, a practitioner who aims to keep you as a client indefinitely should be viewed with suspicion.
The stakes for graduating prematurely are incredibly high. As injury recurrence data reveals, athletes returning to sport within 8 weeks of a hamstring injury have a staggering 13.1 times higher risk of reinjury compared to uninjured athletes. This risk window highlights the absolute necessity of meeting objective criteria before you are cleared. Below are the standard benchmarks you must achieve before considering the transition to a strength coach.
Physio-to-Strength Coach Transition Criteria:
- Achieve less than a 10% strength difference between your injured and uninjured leg on standardized tests (e.g., single-leg hamstring bridge, Nordic curl).
- Pass a battery of functional hop tests (e.g., single leg hop for distance) without pain or compensatory movements.
- Complete sport-specific movements (e.g., sprinting, cutting, jumping) at 80% intensity, pain-free.
- Demonstrate excellent neuromuscular control and balance during dynamic movements.
- Successfully complete at least two full, unrestricted training sessions without any return of symptoms.
Once you have checked all these boxes, you are no longer a patient. You are an athlete ready for performance training. It’s time to thank your physio and find a qualified strength coach to help you build back to, and beyond, your previous peak performance.
How to perform the “Overhead Squat Test” to find mobility leaks?
A torn hamstring is rarely just a “hamstring problem.” It’s often the symptom of a deeper biomechanical issue elsewhere in the body. The muscle tore because it was being chronically overloaded, forced to do a job it wasn’t designed for. A prime culprit is often weakness or restriction in the hips and core. The Overhead Squat (OHS) is a simple but brilliant full-body movement screen that can reveal these “mobility leaks” and “stability faults.”
To perform the test, stand with your feet shoulder-width apart, toes pointing forward. Hold a light dowel or broomstick directly overhead with a wide grip, keeping your arms straight. While keeping the dowel over your head and your heels on the ground, squat down as low as you can comfortably go. The goal is to observe how your body compensates for the movement. Ideally, your torso and shin angles should be parallel, and your arms should remain overhead. Common faults, however, can point directly to the root cause of your hamstring strain.

Your practitioner should perform this test, but you can also film yourself from the front and side to look for these key compensation patterns. Understanding *why* your hamstring was overloaded is the key to preventing it from happening again. The OHS provides a clear, actionable roadmap for your corrective exercises.
| Observed Fault | Underlying Issue | Hamstring Risk | Corrective Focus |
|---|---|---|---|
| Excessive Forward Lean | Tight hip flexors/weak core | Forces hamstrings as primary movers | Hip flexor stretching |
| Knees Caving (Valgus) | Weak glute medius | Hamstring overwork for stability | Lateral hip strengthening |
| Asymmetrical Shift | Previous injury compensation | Unilateral overload risk | Single-leg stability work |
This test transforms your rehab from simply strengthening a torn muscle to rebuilding a more efficient and resilient movement system. It’s a fundamental shift from treating symptoms to solving the problem at its source.
Why frame-by-frame analysis reveals the true cause of tennis elbow?
The principle used to diagnose the root cause of an overuse injury like tennis elbow—slowing down movement to see what the naked eye misses—is directly applicable and even more critical for hamstring injuries. Running, sprinting, and cutting are complex, high-speed movements. A compensation pattern that is invisible in real-time can become glaringly obvious when analyzed frame-by-frame. This is root cause diagnosis in action.
You no longer need expensive lab equipment for this. A smartphone with a slow-motion function is a powerful diagnostic tool. By recording yourself running on a treadmill from the side and back, you can analyze key phases of the gait cycle that put the hamstring at risk. The most common error is overstriding, where your foot lands too far in front of your body’s center of mass. As a leading chiropractic resource explains, this creates a massive braking force that the hamstring must absorb.
During leg descent and foot-strike, the hamstring muscles eccentrically contract to slow down pelvic flexion and leg extension. When the eccentric load exceeds muscle fiber strength, tearing occurs.
– Dubin Chiropractic, Biomechanics of Running and Hamstring Injury
This eccentric braking action is precisely what slow-motion video analysis can help you identify. Armed with this knowledge, you and your practitioner can work on specific running cues (like increasing your cadence or “running over a hot surface”) to correct the fault, rather than just blindly strengthening the muscle that is taking the abuse.
Smartphone Video Analysis Guide for Running Mechanics:
- Set your phone at hip height, about 6-10 feet from a treadmill, to get a side view.
- Record at the highest frame rate possible (120fps or 240fps) for the most detail.
- Look for overstriding: does your foot land significantly ahead of your hips at mid-stance?
- Check for “lazy glutes”: is there limited hip extension at the push-off phase, forcing your hamstrings to pull you forward?
- Observe pelvic stability from a rear view: does one hip drop significantly when you land, indicating weak glute stabilizers on the opposite side?
This simple process empowers you to become an active participant in diagnosing the ‘why’ behind your injury, a crucial step toward a permanent solution.
Key Takeaways
- The goal of hamstring rehab is a “rehab continuum” that progresses from passive care to active loading, not a choice between practitioners.
- Root cause analysis, using tools like the Overhead Squat Test and video analysis, is essential to identify and fix the biomechanical faults that led to the injury.
- A successful return to sport is guided by passing objective “exit criteria” for strength and function, not just by the absence of pain, to prevent reinjury.
How to Accelerate Soft Tissue Repair Without Anti-Inflammatories?
For decades, the go-to advice for a soft tissue injury was RICE: Rest, Ice, Compression, and Elevation. Recent evidence has turned this advice on its head, particularly the use of ice and anti-inflammatory drugs (NSAIDs). While they are effective at reducing pain, they do so by blunting the inflammatory process. The problem? Inflammation is a necessary and vital part of healing. It’s the first step in the body’s natural repair sequence, bringing blood flow and signaling molecules to the injured site. By aggressively inhibiting it, you may feel better in the short term but could be delaying or weakening the overall healing process.
The new, evidence-based acronym is PEACE & LOVE. This protocol respects the body’s biology, working with it rather than against it. The “PEACE” portion guides the initial days post-injury, and “LOVE” guides the subsequent phase of loading and recovery.
PEACE & LOVE Protocol in Practice
Clinics implementing the PEACE & LOVE protocol report significant improvements in patient outcomes. A common report is from a runner who, while initially skeptical of avoiding ice and NSAIDs, found that their recovery was faster and felt more robust. By following a program centered on early, gentle loading and progressive exercise, patients often experience better range of motion, increased strength, and greater confidence in the injured area, leading to a lower incidence of reinjury.
The superiority of this modern approach is backed by solid science. For instance, a recent systematic review evidence shows that a protocol emphasizing early loading and exercise is more effective than traditional, passive methods for acute soft tissue injuries. The full PEACE & LOVE protocol provides a complete roadmap for optimal tissue repair.
The PEACE & LOVE Recovery Protocol:
- P – Protect: Unload or restrict movement for 1-3 days to prevent further damage.
- E – Elevate: Keep the injured limb higher than the heart to promote fluid drainage.
- A – Avoid Anti-inflammatories: Avoid ice and NSAIDs to allow the natural healing process to begin.
- C – Compress: Use a bandage or taping to reduce swelling without restricting circulation.
- E – Educate: Understand that your body knows how to heal and that active recovery is superior to passive rest.
- L – Load: Gradually reintroduce mechanical stress as tolerated to stimulate tissue repair and remodeling.
- O – Optimism: A positive and confident mindset is linked to better recovery outcomes.
- V – Vascularization: Engage in pain-free cardiovascular activity to increase blood flow to the healing tissues.
- E – Exercise: Restore mobility, strength, and proprioception with a targeted, progressive exercise program.
Adopting this protocol is a fundamental shift toward empowering your body’s innate healing capacity.
Your recovery is in your hands. The choice is not about a practitioner’s title, but about your commitment to a strategic, evidence-based process. Your next step is not to guess, but to assess. Use these frameworks to question your practitioner, audit your own movement, and take ownership of every step on your journey back to peak performance.